Easy Grilled Corn on the Cob
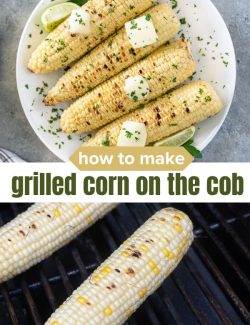
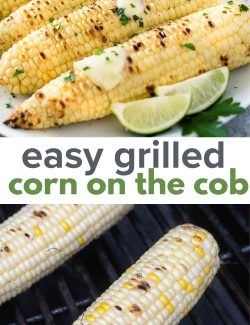
It isn’t summer without sweet, smoky Grilled Corn on the Cob! This recipe is a tutorial on how to grill corn using 3 different cooking techniques. Learn how to grill corn in the husk, in foil, or with the husk removed!
One of the ingredients that I look forward to the most in the summer is corn. It’s crisp, sweet and I love how versatile it is.
It’s truly easy to prepare oven roasted corn, but during the warmer months I prefer to make air fryer corn on the cob or this smoky Grilled Corn on the Cob.
I love prepping a batch of grilled corn to eat as-is with grilled burgers, tequila lime chicken, or cut the corn off the cob to toss into my Santa Fe salad!
There’s really no wrong answer. 🙂

Why you’ll love this recipe:
- You’ll learn how to make grilled corn on the cob in foil, in the husk, and with the husk removed quickly and easily.
- Recipe yields perfectly tender grilled sweet corn every single time.
- It’s extremely versatile and can be eaten right off the cob or used in a number of different dishes.
Recipe ingredients
The corn is the star of this recipe — the remaining ingredients can be customized to suit what you have on hand or special diets that you might have.
Ingredient notes
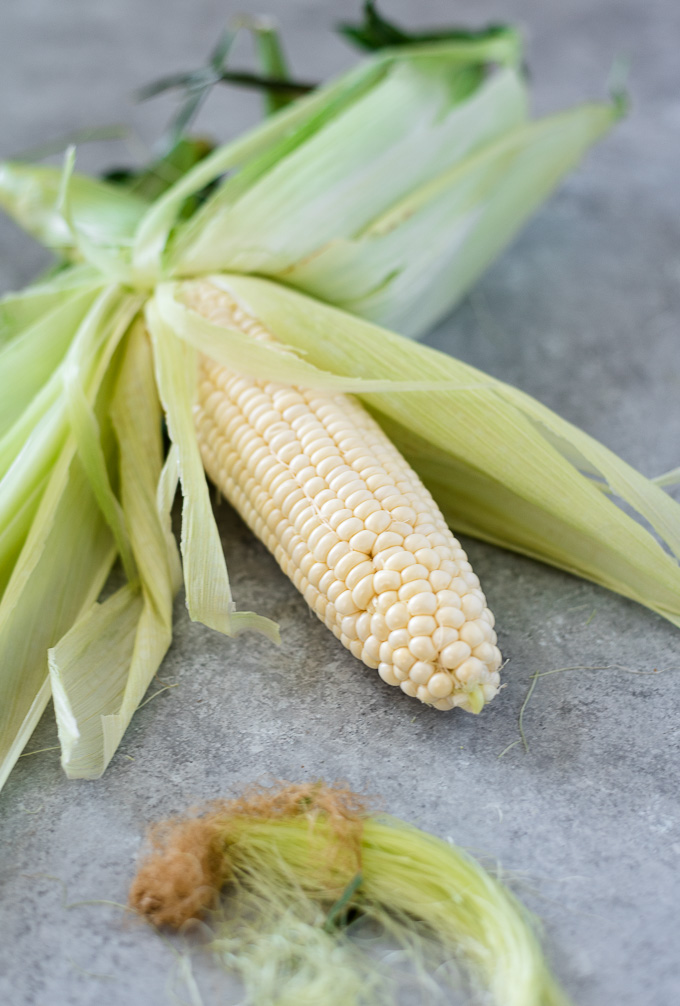
- Corn. Use your favorite variety of fresh corn on the cob. White, yellow and bi-color corn are all great options! You can purchase pre-shucked corn as a time saver, but corn in the husk is the most affordable.
- Oil. Rub the corn in a bit of oil when cooking corn in foil or with the husk removed. You can also use butter if cooking the corn in foil for added flavor.
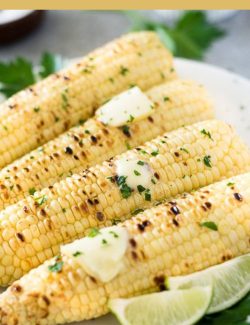
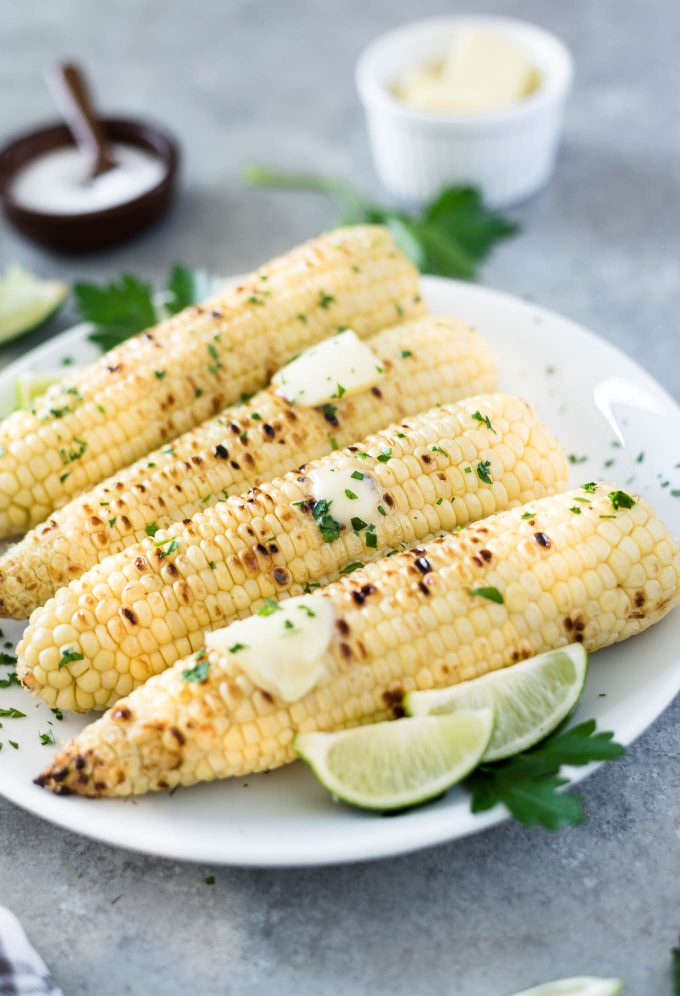
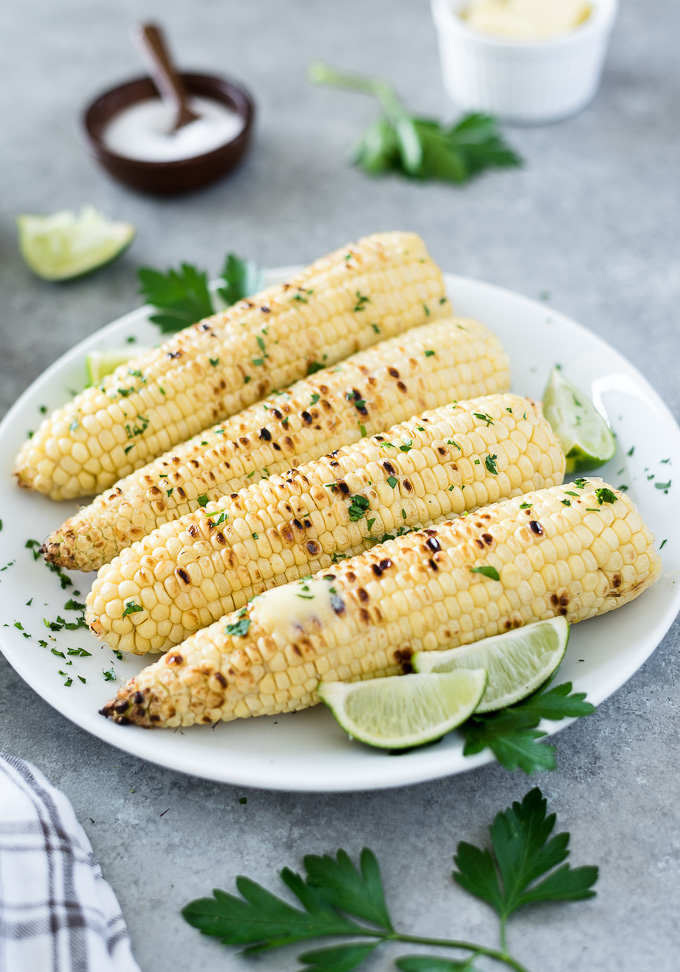
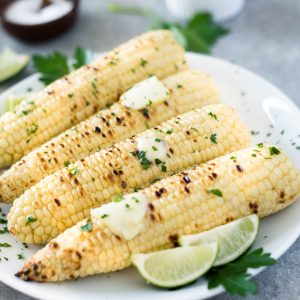
- Optional ingredients. I served my grilled corn with butter, fresh lime juice and chopped parsley, but these are completely optional.
How to grill corn on the cob
Grilled corn is very easy to make, and there are (3) simple methods to choose from. The results vary slightly, but they all produce perfectly tender, smoky corn on the cob.
Choose from the (3) cooking methods below:
- Without the husk
- In the husk with silks removed
- In foil
How to grill corn on the cob without the husk
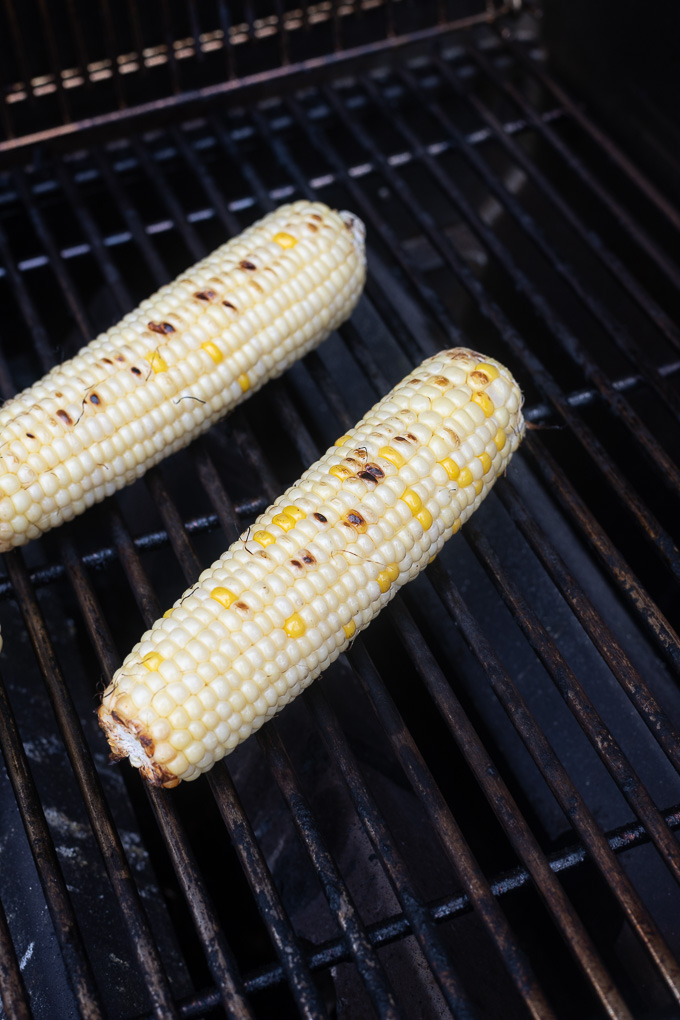
In my opinion, the best grilled corn on the cob is achieved by shucking the corn and cooking it in direct heat, or right on the grill.
Grilled corn on the cob without husks achieves the big smoky flavor that I want my grilled corn to have, and is the best way to achieve a beautiful char.
Pro tip: Remove stubborn silks by rubbing with a paper towel.
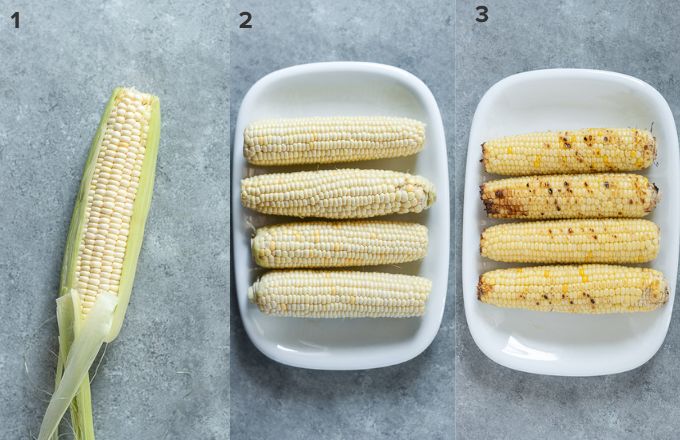
- Remove the husks and silks.
- Coat the corn with oil.
- Grill for 12-16 minutes over medium high heat, turning every 3-4 minutes until charred on all sides.
How to grill corn in the husk
If you prefer your grilled corn to have less smoky flavor and don’t care as much about the char marks, this is a good option for you.
Leaving the husks on protects the corn from direct exposure to the heat, and yields corn that’s more tender as it is steamed inside the husk.
The drawback to grilling corn in the husk is that there’s a risk that the silk and/or husk will catch fire.
I’ve grilled corn in the husk many times without soaking it, and have never encountered flare-ups. If you’re worried about it, follow the steps below to prevent flare-ups from occurring:
- Gently pull back the husk about halfway and remove the silks.
- As an added precaution, soak the corn in the husk after the silks are removed for 10-30 minutes before grilling. This will add moisture to the husk to prevent flare-ups.
- With the husk pulled back, coat the corn in olive oil and salt, to taste. Pull the husk back over the corn to cover.
- Grill for 15 minutes over medium high heat, turning every 3-4 minutes to cook on all sides. Check for doneness by pulling the husk back carefully and cook up to 5 minutes longer if necessary.
How to grill corn on the cob in foil
This cooking method is similar to grilled corn in the husk, and is a great option if you’re worried about the husk catching fire.
Grilled corn in foil results in very tender corn as well, as the corn steams inside the foil.
- Shuck the corn and coat with olive oil and salt, to taste, or brush the corn with melted butter.
- Grill for 16 minutes over medium high heat, turning every 3-4 to cook on all sides. Check for doneness, and cook 3-5 more minutes if necessary.
FAQs
There are (3) ways to make grilled corn — in the husk, in foil or without the husk. Each method produces tender, perfect corn on the cob with slightly different results.
Grilling corn in foil or in the husk steams the corn and reduces smoky flavor and char marks. Grilling corn out of the husk produces beautiful char marks and great smoky flavor.
Grilled corn takes 12-16 minutes to cook over medium high heat on the grill. A good rule of thumb is to cook the corn between 3-4 minutes per side.
When checking grilled corn for doneness, look for kernels that are plump and tender. You can use a the tip of knife to test a kernel when in doubt. Some kernels may be slightly shriveled in appearance, but that’s totally fine.
Serving suggestions
There are so many ways to serve grilled corn — it’s such a versatile veg.
- Serve right on the cob smothered with butter and a bit of salt with your favorite dishes such as grilled tomahawk steak and grilled bbq chicken.
- Cut off the cob and use in Mexican corn salad.
- Prep a batch to use in recipes throughout the week such as stuffed jalapeños, skillet cornbread and sweet potato enchiladas.
Recipe notes
- Pro tip: Remove stubborn silks by rubbing with a paper towel.
- If grilling the corn in foil, you can omit the oil and brush the corn with melted butter if desired.
- Change things up by seasoning your corn with your favorite spices or rubs, butter, herbs or pesto sauce!
- Use pre-shucked corn for methods 2-3 to save time.
More corn recipes you’ll love:
- Corn recipes
- Grilled corn salsa by Minimalist Baker
- Mexican corn salad
- Stuffed jalapeños
- Zucchini fritters
Did you try this recipe? If so, be sure to leave a review below and tag me @flavorthemoments on Facebook and Instagram
Easy Grilled Corn on the Cob
Ingredients
- 4 ears corn
- 1 tablespoon olive oil if cooking without husk
- salt to taste
- Butter, lime wedges and chopped parsley, for serving optional
Instructions
- Preheat the grill to medium high heat.
Method 1: Grilled corn on the cob with husks on:
- Peel back the top part of the husk and remove the silks to prevent them from catching on fire on the grill. Rub the corn with the olive oil and season with salt, to taste, then pull the husk back over the corn to cover.
- Cook for 15 minutes, over medium high heat, turning every 3-4 minutes to cook on all sides.
- Shuck and serve!
Method 2: Grilled corn cooked in foil:
- Shuck the corn and coat with olive oil and salt, to taste. Cover in foil and cook for 15 minutes, over medium high heat, turning every 3-4 minutes to cook on all sides.
- Remove foil and serve!
- Method 3: Grilled corn without husk or foil
- Shuck the corn and coat with olive oil and salt, to taste.
- Cook for 12-16 minutes, over medium high heat, turning every 3-4 minutes or until well charred and cooked on all sides.
- If the corn is cooking too quickly, reduce the heat to medium.
- Serve corn on the cob warm with fresh lime juice, a pat of butter and freshly chopped parsley if desired. Enjoy!
Notes
- Nutrition information does not include butter, lime or herbs as those ingredients are optional.
- If grilling the corn in foil, you can omit the oil and brush the corn with melted butter if desired.
- Change things up by seasoning your corn with your favorite spices or rubs, butter, herbs or pesto sauce!
- Rub the corn with a paper towel to remove stubborn silks.
- Use pre-shucked corn for methods 2-3 to save time.
Nutrition
Nutrition is estimated using a food database and is only intended to be used as a guideline for informational purposes.
**This recipe was originally published in June 2019. Step by step photos have been added and the text has been modified to include more recipe information.

8 Comments on “Easy Grilled Corn on the Cob”
grilled corns are kinda staple in our homes specially in rainy season.. Looks so mouth watering.
Thank you Priya!
Grilled corn is my all time favorite and I like mine with loads of chili and lime. Your post is so informative with wonderful pictures!
Chili and lime sounds wonderful! Thanks so much. 🙂
Ok, I’m convinced. I’ve really only boiled corn, since that’s how I ate it growing up! I’m totally eyeing those char marks though. My boys LOVE corn! We eat it all of the time in the summer. You can bet I’ll be referring to this guide the next time I made corn!!
Grilled corn is such a treat — I hope you get to try it Katherine!
The only way I enjoyed corn growing up was boiled, but grilled is definitely my preference these days. I usually grill it right on the grill without the husk or wrapped in foil. I’ve never tried grilling it in the husk. I’ll have to give that a try next time!
Same here! It’s so much better when it’s in direct contact with the grill in my opinion. Grilling it in the husk was a bit of a pain after it was done as the husk was dry and charred and got everywhere when I removed it!