Chocolate Dessert Charcuterie Board
This post was sponsored by Valley Fig Growers. All opinions expressed here are mine alone, as I only promote products that I truly love.
Chocolate Dessert Charcuterie Board includes recipes for chocolate covered figs, chocolate nut roll, and tips on how to make the perfect chocolate board for your next party or gathering!
Chocolate makes my world go round. I eat some form of chocolate every day, whether it’s in a snack bar, breakfast or dessert.
And if it’s a good day, I have it more than once. 🙂
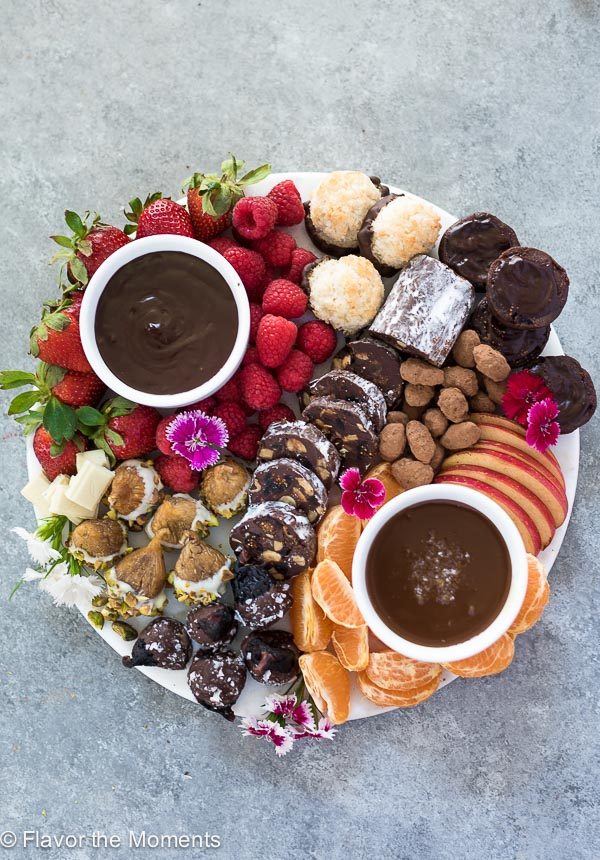
This Chocolate Dessert Charcuterie Board is guaranteed to satisfy the biggest chocolate cravings…even mine!
It’s filled with chocolate ganache and salted caramel sauce for dipping fresh fruit, and all the chocolate treats that you can imagine.
It’s chocolate heaven.
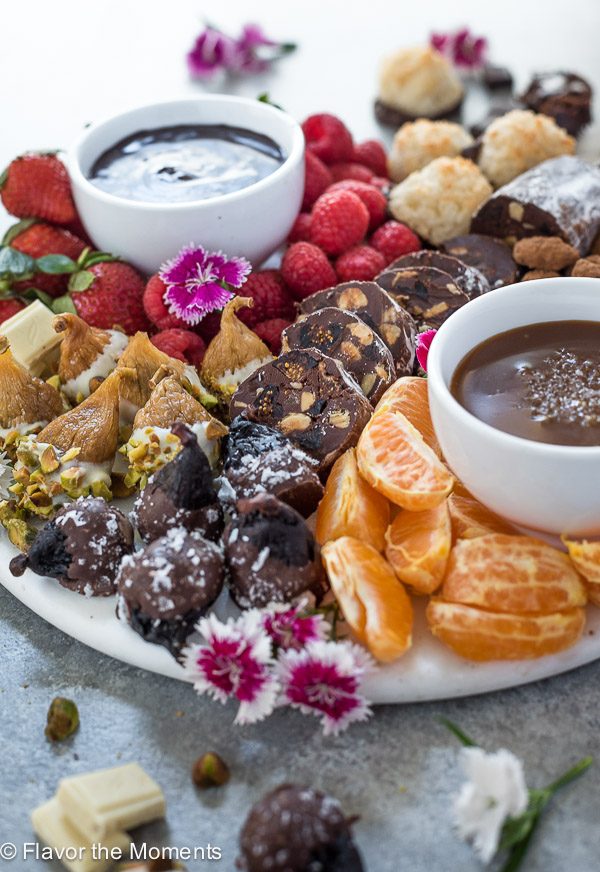
Things get even better, because I’ve incorporated Valley Fig Growers’ California Figs into this board. I absolutely love figs, and it just so happens that they pair beautifully with chocolate.
Some things were just meant to be. 🙂
I’m a huge fig lover, which you probably know by now. Check out my produce guide on figs to learn more about one of my favorite fruits!
Valley Fig Growers is located in Fresno, and sells its figs under the brands Blue Ribbon Orchard Choice, Sun-Maid, Orchard Choice, and Blue Ribbon.
I was amazed to learn that all commercially sold dried figs produced in the United States are grown in California, in the Fresno area, and north in the San Joaquin Valley.
In fact, California represents 10% of the world production of dried figs. And California figs are the best dried figs!
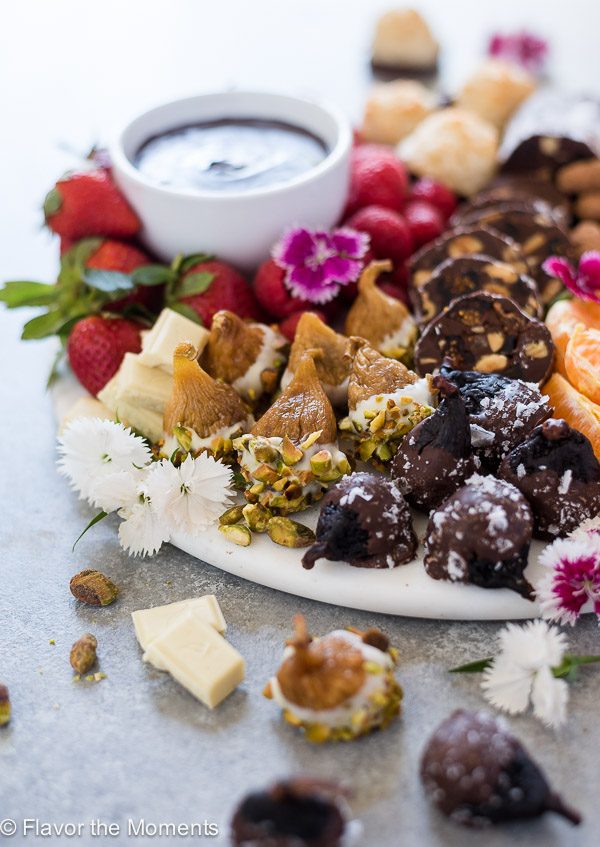
Dessert charcuterie boards are great for entertaining because they always wow the crowd. There’s absolutely nothing better than sampling an array of delicious treats is there?
You can get as creative as you wish when creating your board (or keep things simple!), and it’s easily scaled to serve any number of people.
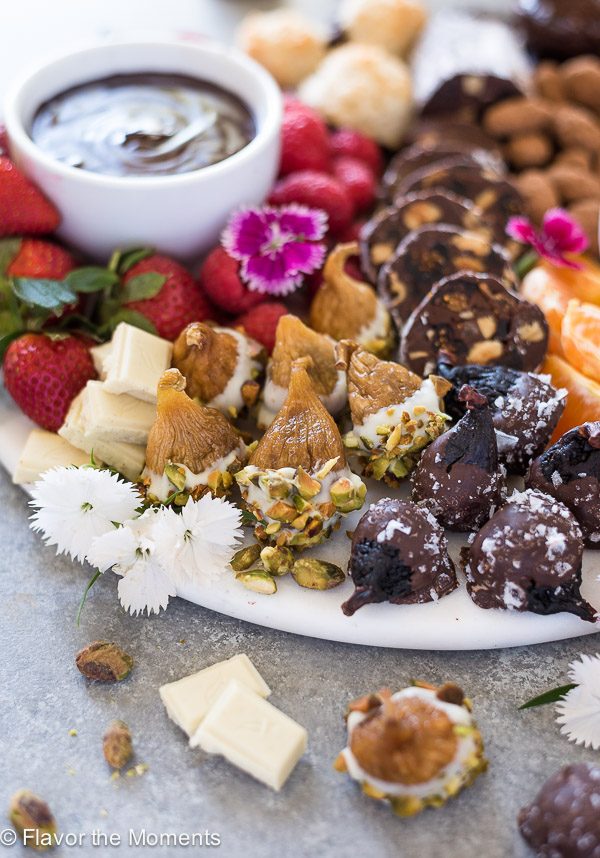
My chocolate board has a fig theme, so everything on the platter pairs well with figs.
Planning your board
The first thing to think about is how many guests you’ll be serving, and how you want to present your platter.
You can use one larger board, or put together a few smaller ones — anything goes.
Decide how many items you’d like to include, and which ones you’d like to make yourself. I included a combination of homemade treats, some store bought, as well as some fresh fruit.
My dessert charcuterie board includes the following:
- Almond dragees
- Apples
- Brownie bites
- Chocolate dipped coconut macaroons
- Chocolate covered figs
- Chocolate ganache
- Chocolate nut roll
- Clementines
- Raspberries
- Salted caramel sauce
- Strawberries
- Squares of white and dark chocolate
- Consider my other candy recipes as well!
Out of the items listed, I made the almond dragees, coconut macaroons, salted caramel sauce, chocolate ganache, chocolate covered figs, and chocolate nut roll.
How to make a chocolate nut roll
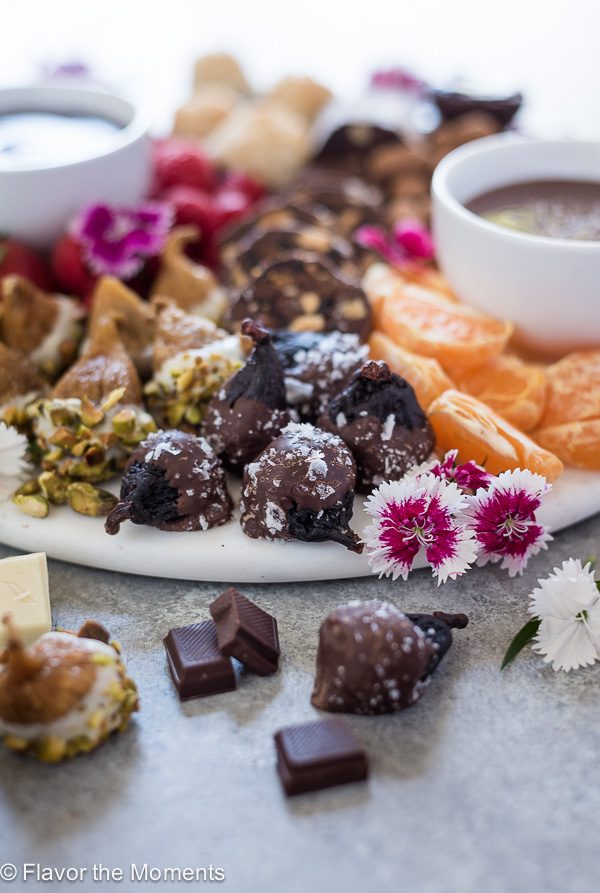
The focal point of my platter is my chocolate nut roll, which is similar to chocolate salami without the crispy cookies. It’s super simple to make, and can be customized with your favorite ingredients.
My chocolate roll consists of a combination of dark and semi-sweet chocolate, chopped roasted hazelnuts, Sun-Maid California Mission Figs, orange zest and a bit of chopped candied ginger for a kick of flavor.
- Melt the chocolate and butter in a double boiler, or my preferred method, in a heat proof bowl placed in a pan of simmering water.
- Stir in your ingredients, and let cool a bit before forming into a log.
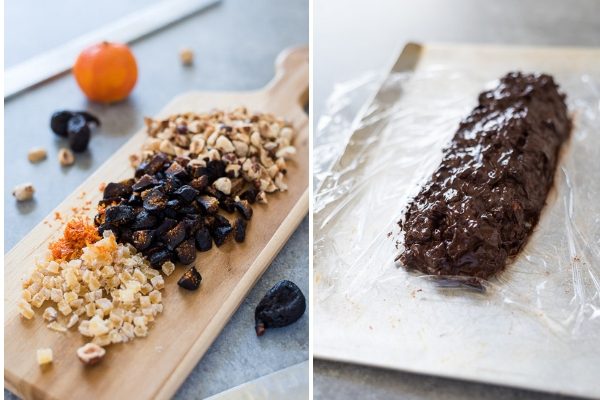
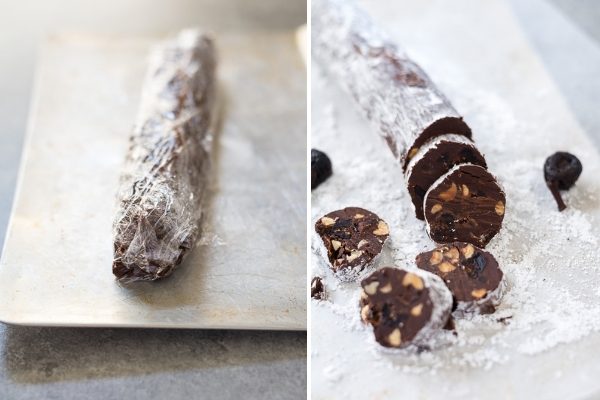
- Wrap the log tightly in plastic wrap and chill in the refrigerator for 4 hours or overnight.
- Once set, roll the chocolate log in some sifted powdered sugar for a fun salami effect. 🙂
- Allow the roll to set at room temperature for just a bit as it will be easier to slice. The slices can crack easily if the roll is cold.
- Slice into 1/4″ slices and serve! The chocolate roll may be made a few days in advance, and leftovers keep well in an air tight container in the fridge for up to 2 weeks.
How to make chocolate covered figs
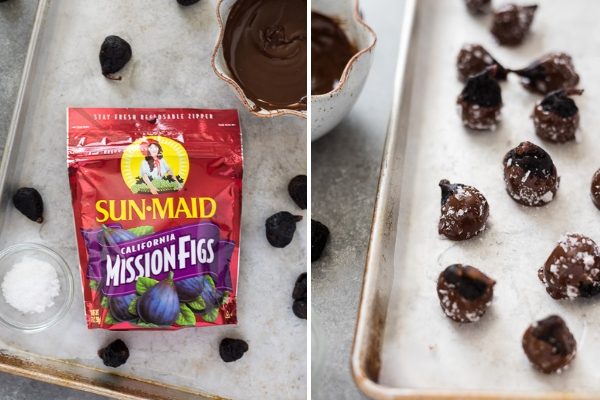
Making chocolate covered figs is extremely easy! I included both Sun-Maid California Mission Figs and Sun-Maid California Golden Figs in my board for a nice contrast in color, and because they both have very different flavor profiles.
Mission figs have a very deep flavor, so I decided to dip them in dark chocolate with a sprinkle of flaky sea salt. The combination is amazing!
Golden Calimyrna Figs are sweeter, with a caramel flavor, so I dipped them in white chocolate and coated them in roasted, salted pistachios.
I highly recommend using the roasted, salted pistachios, as they balanced out the sweetness really well.
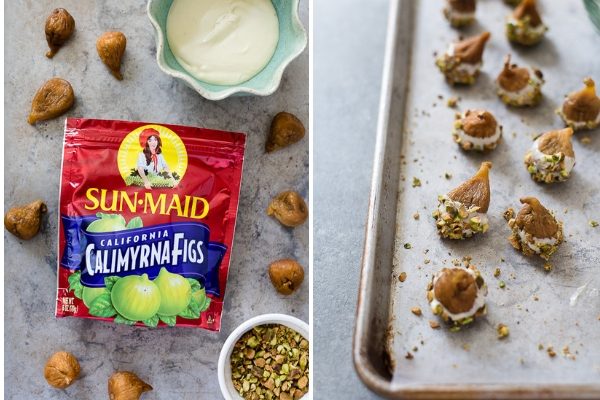
- Simply dip the figs in the melted chocolate, sprinkle with the sea salt or nuts, and place on a baking sheet lined with waxed paper.
- I dipped my figs in chocolate the night before I served them and left them out at room temperature to set. Once they were set, I wrapped them loosely in plastic wrap and left them out until the next day for serving.
- This worked really well for me, but if it’s a really warm day, the figs may not fare as well at room temperature.
How to make a chocolate board
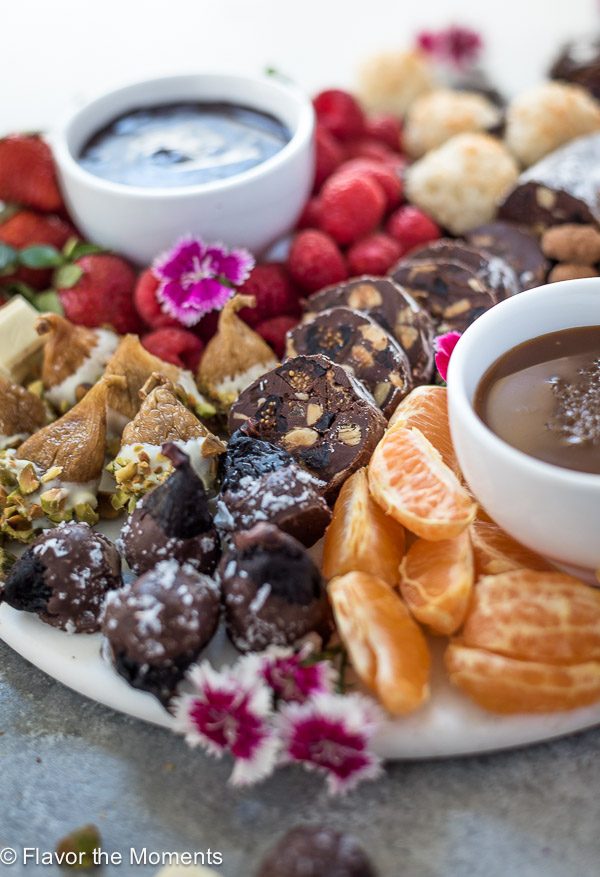
- When I’m assembling your dessert charcuterie board, start by placing the bowls of dip or spreads on the board first.
- I place them on opposite sides of the board so that people can dip from two different sides, and I arrange the foods that will be dipped in the spreads the closest to the dip.
- Build the rest of your board by placing ingredients in a way that adds interest, texture and color contrast. Keep in mind that everything doesn’t need to go on the board at once. You can replenish items as you need to.
- Get creative and have fun — anything goes! And your guests will love you for it. 🙂
More delicious board ideas:
- Crudités platter
- How to make a cheese board
- Smoked salmon platter
- Chocolate Hummus
- Christmas Cookie Board by The Simple Sweet Life
More fig recipes you’ll love:
Did you try this recipe? If so, be sure to leave a review below and tag me @flavorthemoments on Facebook and Instagram
Chocolate Dessert Charcuterie Board
Ingredients
Chocolate Nut Roll:
- 8 ounces chocolate chips 1/2 semi-sweet, 1/2 bittersweet
- 2 ounces (4 tablespoons) unsalted butter
- 1 tablespoon orange zest
- 1/2 cup chopped Sun-Maid California Mission Figs
- 1/2 cup chopped toasted hazelnuts
- 1/4 cup chopped candied ginger
- 1/8 teaspoon sea salt
- 1/4 cup sifted powdered sugar
Dark Chocolate Dipped Figs with Sea Salt:
- 6 ounces Sun-Maid California Mission Figs
- 1/2 cup dark chocolate chips
- 1/4 teaspoon sea salt
White Chocolate Dipped Figs with Pistachios:
- 6 ounces Sun-Maid California Golden Figs
- 1/2 cup white chocolate
- 1/2 cup chopped roasted salted pistachios
For serving:
- Salted caramel sauce
- Chocolate ganache
- Assorted nuts
- Assorted squares of chocolate or candies
- Fresh fruit
- A variety of sweet treats such as:
- Almond Dragees
- Chocolate Dipped Almond Horns
- Brownies or brownie bites
- Chocolate Dipped Coconut Macaroons
- Flourless Peanut Butter Cookies
- Salted Caramel Chocolate Truffles
- Salted Dark Chocolate Toffee Fudge
- Rocky Road Candy
- Edible flowers are also a nice touch!
Instructions
Prepare the Chocolate Nut Roll:
- Melt the chocolate and butter together in a heatproof bowl set inside a pan of simmering water on the stove top over medium low heat, stirring constantly until smooth. Remove from heat and stir in orange zest, chopped figs, hazelnuts, ginger and sea salt until combined. Allow to cool slightly.
- Pour the cooled mixture onto plastic wrap set over a baking sheet and shape into a log about a foot long, then wrap tightly. Refrigerate until set about 4 hours or overnight. Before serving, coat the nut roll in the powdered sugar and allow to soften slightly at room temperature, then cut into 1/4″ slices (about 24 slices). Cutting the chocolate roll when cold may result in cracks.
Prepare the dark chocolate sea salt figs:
- Place waxed paper on a baking sheet.
- Melt the chocolate in a heatproof bowl set inside a pan of simmering water on the stove top over medium low heat, stirring constantly until smooth.
- Dip the figs into the chocolate, sprinkle with sea salt, and place on the waxed paper. Allow to set for about 30 minutes to 1 hour before serving.
Prepare the white chocolate pistachio figs:
- Place waxed paper on a baking sheet.
- Melt the white chocolate in a heatproof bowl set inside a pan of simmering water on the stove top over medium low heat, stirring constantly until smooth.
- Dip the figs into the chocolate, coat with the chopped pistachios, and place on the waxed paper. Allow to set for about 30 minutes to 1 hour before serving.
Notes
- This recipe can be easily scaled to feed any size crowd!
- The chocolate nut roll may be made a few days in advance. Leftover slices may be stored in the fridge in an air tight container for up to 2 weeks.
- Get creative with your chocolate nut roll ingredients! Use your favorite nuts, marshmallows, etc.
- If the weather isn’t too warm, the chocolate dipped figs may be made up to a day in advance at room temperature covered loosely with plastic wrap.
Nutrition is estimated using a food database and is only intended to be used as a guideline for informational purposes.


14 Comments on “Chocolate Dessert Charcuterie Board”
I used your post to build a charcuterie board with your ganache and caramel sauce, fruit, truffles, chocolate dipped fresh figs with chopped pistachios, kolache cookies with apricot and fig jam, cashews and pistachios, and crostini with goat cheese and chopped figs marinated in balsamic vinegar, salt and pepper. Big hit at book club. Thank you for all of your recipes and suggestions.
I’m glad it was a hit and thanks so much for your feedback!
This dessert board is beautiful…chocolate is a winner!! What size board did you use here?
Thank you, and you can never go wrong with chocolate! It was about a 14-16” round board. I’d measure it but I’m traveling…sorry!
Chocolate heaven is right. 🙂 I used to own a chocolate store and had lots of different chocolate covered fruits but never figs. I’ll can wait to try them.
You did?? That sounds amazing Karen, and I love all fruit dipped in chocolate!
Goodness me! This dessert board is like my dream! haha Sitting around, munching on all this goodness! I love me some figs and this is such a fun way to use them!
I could’ve used some help eating this — wish you would’ve been here! 🙂 Thanks Ashley!
I’m a definite fig lover, and of course, I adore all things chocolate, so this board needs to happen in my house! It’s only breakfast time here now, and all I’m craving is that chocolate roll. A few slices of that and some chocolate dipped figs with my cup of coffee, and I’d be set! p.s. I just rated your recipe, and tried to give it five stars but it only registered 4.5. This board is totally 5-star!
I wish I could’ve shared this with you since we’re on the same page with chocolate and figs! The chocolate roll kept well in the fridge, and I’m not going to lie. I ate it mid-morning a few times!
Oh my goodness, what a gorgeous dessert board! I love the idea of whipping this up for a dinner party.
Thank you very much Nicole!
I’m imagining a book club sitting around this beautiful board with some wine in hand. I would love this! It looks so good, Marcie. I bet it would be tough to stop eating those figs 😉 Hope you had a happy Mother’s Day!
A book club would be a great setting for this board…with wine in hand of course. 🙂 The figs are addicting too, and I hope you had an amazing Mother’s Day as well!